Can't email your important files through? Tired of being messed about? Then pack them inside an image with Email Attachment Transformer and send them off.
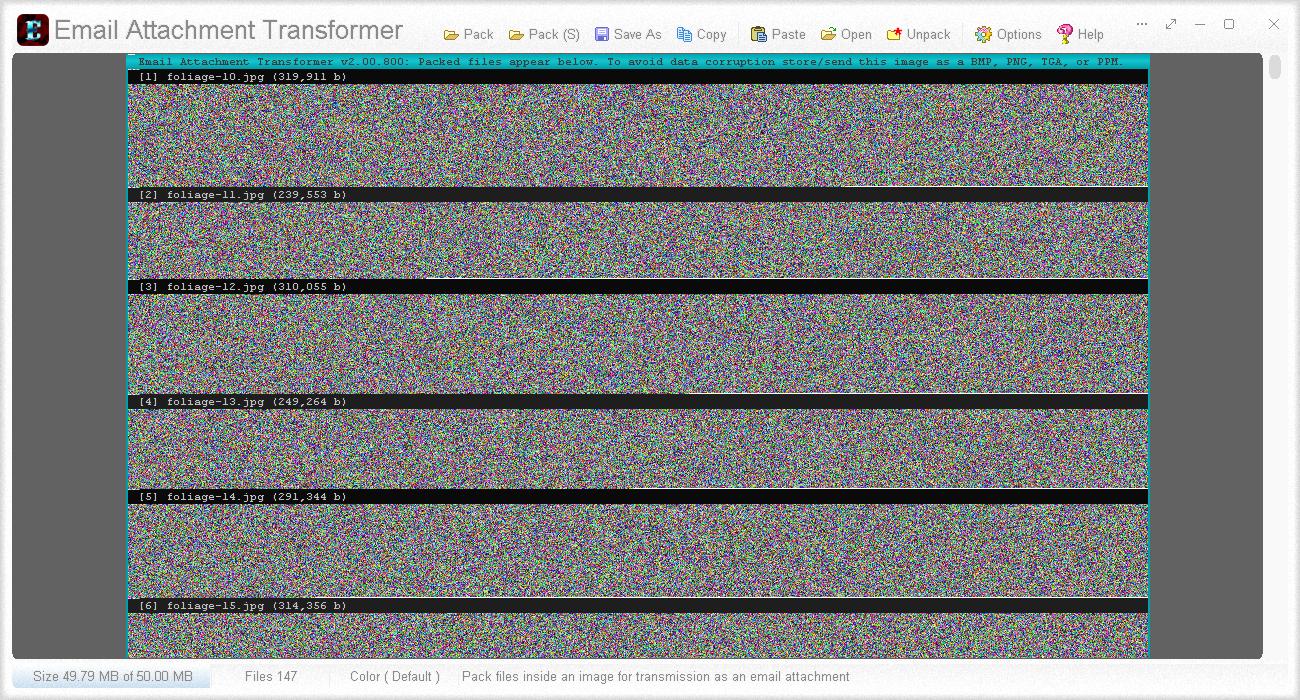
A visual label proceeds each packed file for clear reference
- Various pack options: Pack folder files (all files in a folder), pack folder files and sub-folders (all files in a folder and its sub-folders), or pack dropped files
- Store upto 50 MB of files (more with compression)
- Pack fast and without fuss with auto clear. Previous content is wiped and new content packed cleanly with no need to reset, clear or start afresh between packs.
- Each file has a visual label with a number, path, name, and file size
- Automatic compression for best fit
- 8 header and footer colors: Default, Red, Yellow, Green, Blue, Purple, Pink and White
- Packed files are stored inside a single, lossless bitmap image
- Copy the image to Clipboard and paste directly into your email message, or save as a BMP, PNG, TGA or PPM and attach to your email message and send
- Email recipient can easily drag and drop the image straight onto Email Attachment Transformer, or paste it in from Clipboard, or load it up from file, and click the "Unpack" link for a temporary folder with all files unpacked ready for access.
- Both sender and recipient require a copy of Email Attachment Transformer
- Options Window - Easily change app color, font, and settings
- Portable
Information
App Name
Email Attachment Transformer
Version
2.0.815
Type
Desktop App (Standard Edition)
License
MIT
Status
Release Date
27th November 2025
Portable App
Yes
Code Foundation
4th Generation (Gossamer for GUI)
Operating System(s)
Windows All and Wine for Linux and Mac
SHA256 Checksum
for "eat.exe"
EAD780447DC6C8C686A0CD5B6F1612B1101384C03E0A3E393E77394355AC87AA
Downloads
Images

A visual label proceeds each packed file for clear reference
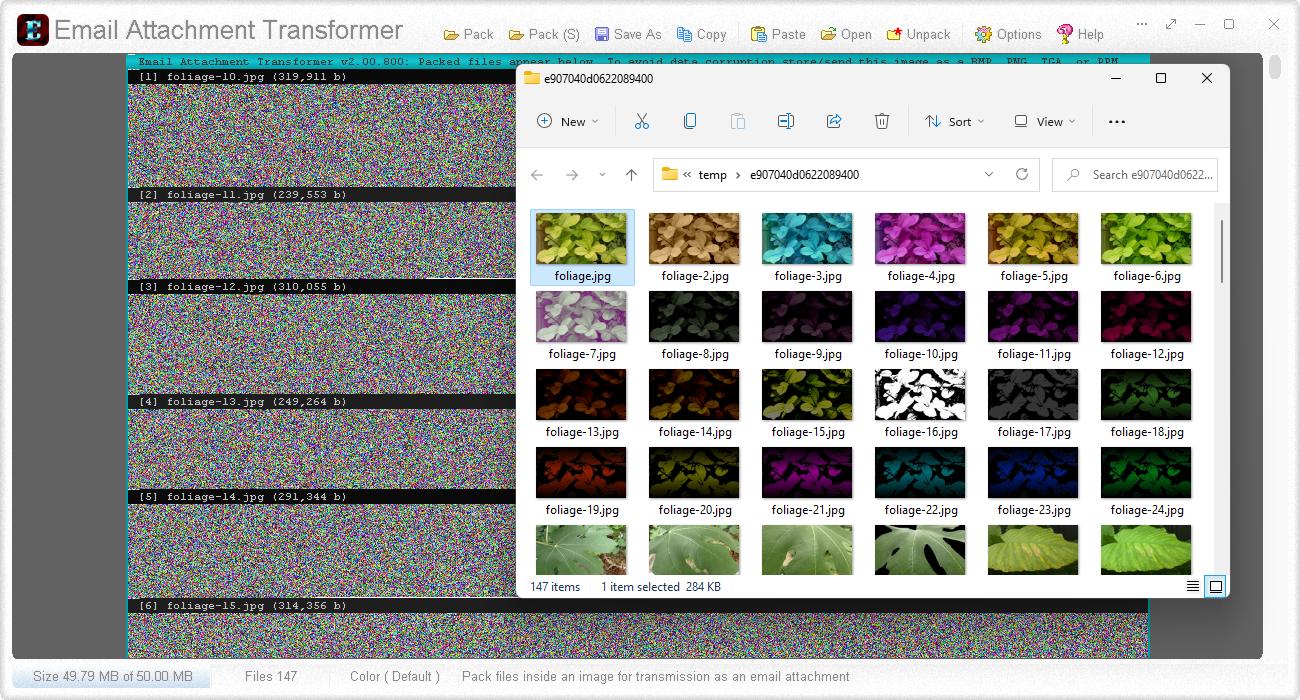
Click the "Unpack" button for a temporary folder with all files unpacked ready for access
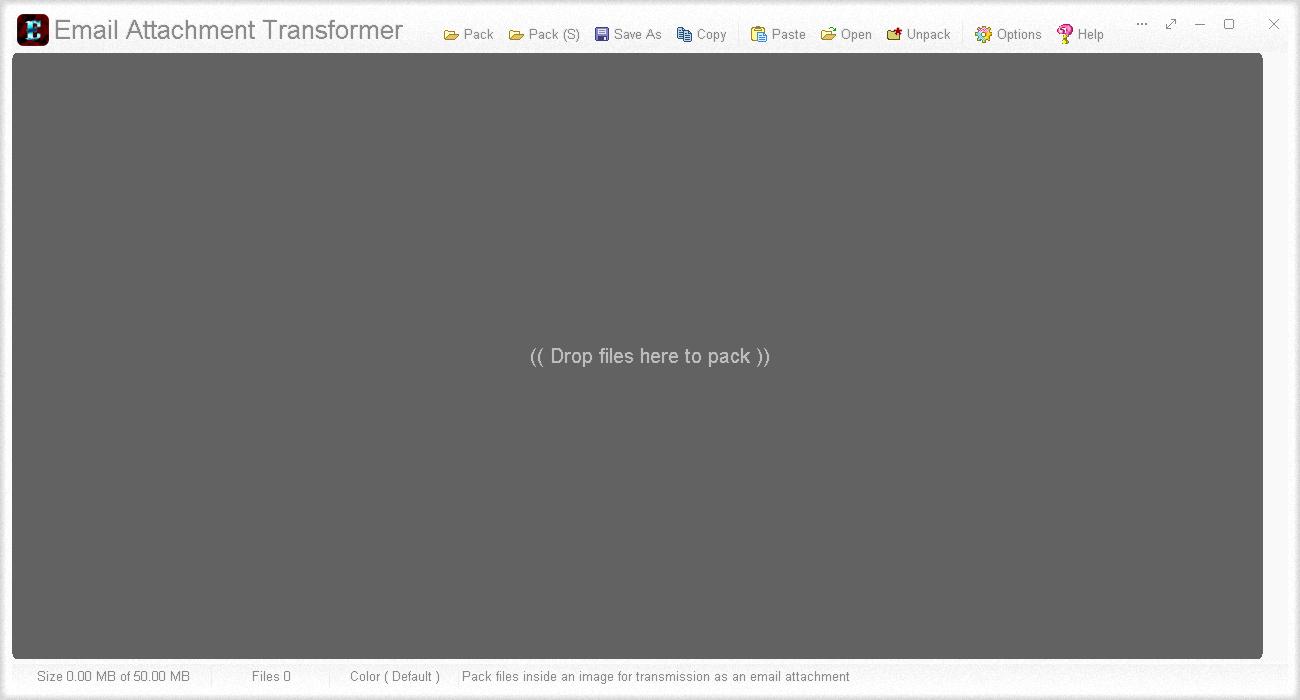
Drop a selection of files to pack them
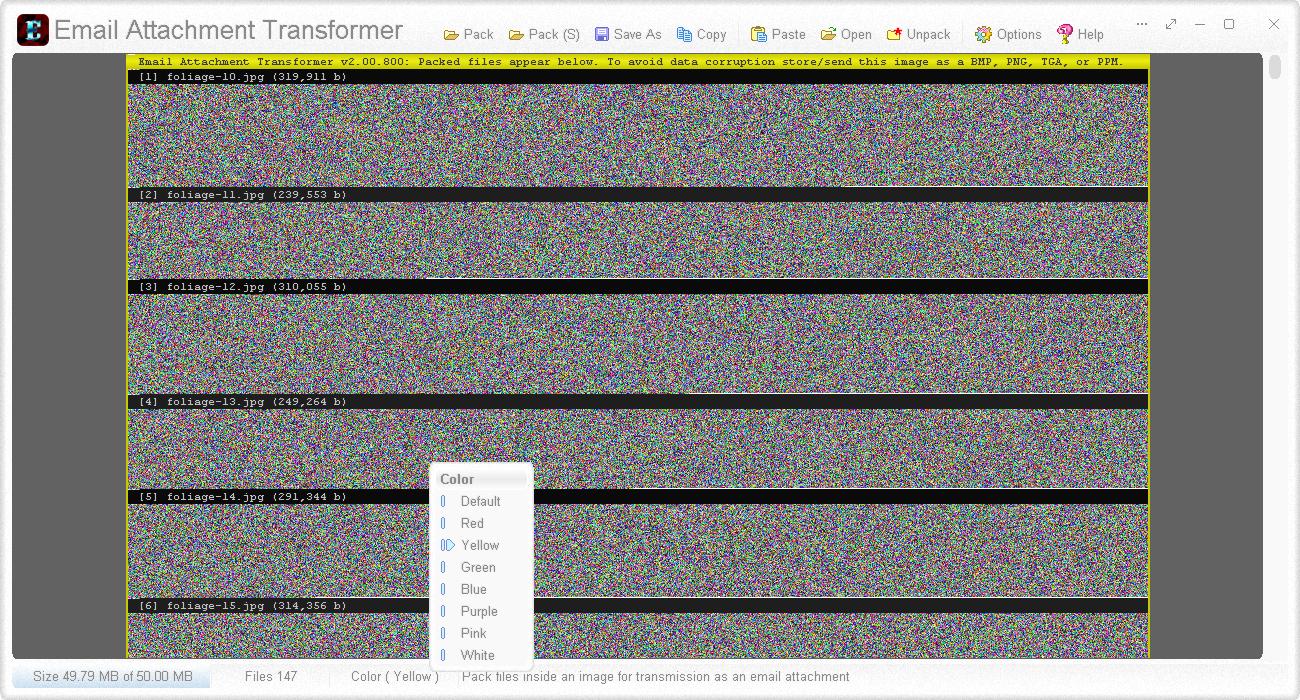
Files packed using a yellow header and footer color
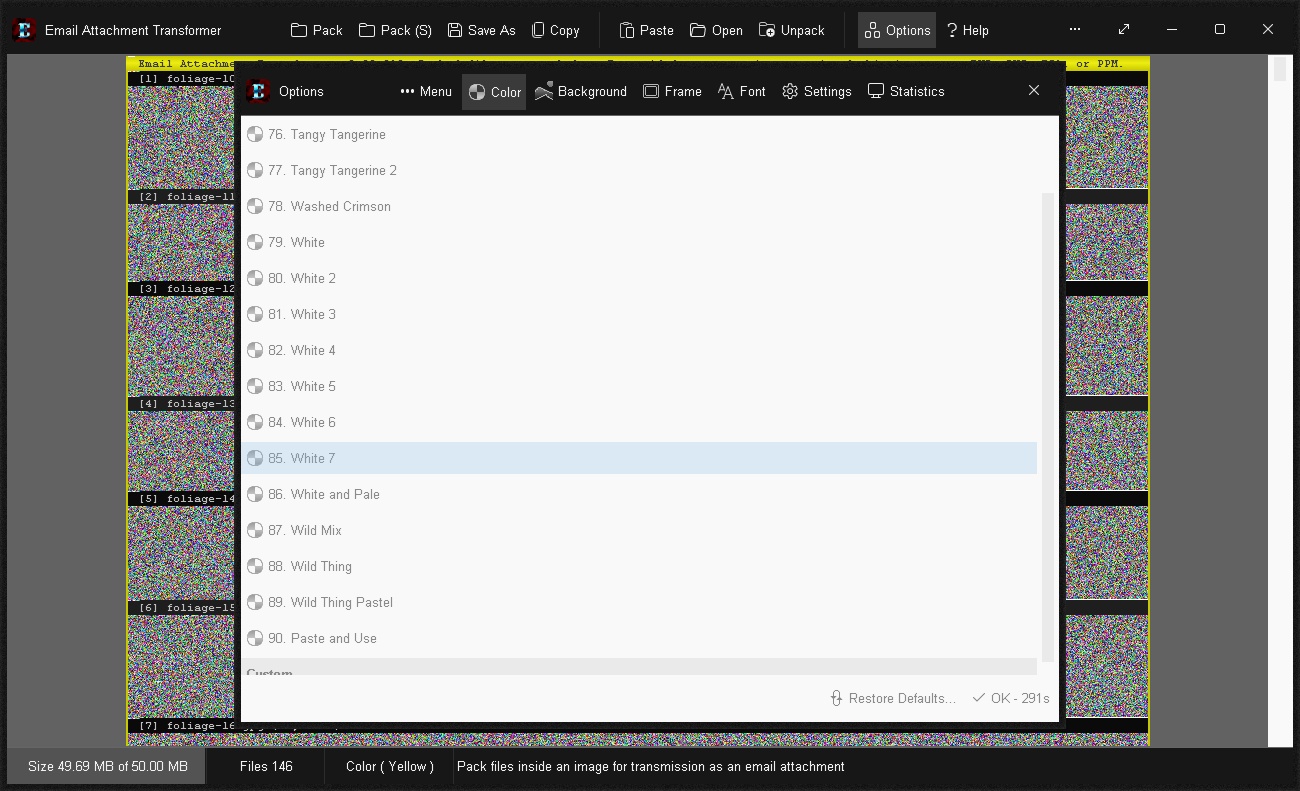
Email Attachment Transformer colored with the Deep Yellow 2 color scheme - "Options > Color"
Online Help
Change the coloring of the app's GUIFrom the top toolbar click on "

Options" or click the app menu "

" (top right of window) > "Options". An "Options" window will display. Select the "

Color" tab to show a list of color schemes.
The "Color Schemes" list is split into three parts:
1. Built-In color schemes which are used as is
2. Custom color schemes that can be adjusted and are numbered 1 through 10
3. And Saved color schemes, which also can be adjusted
There are 80+ built-in color schemes. Select one to view it. Try "Black" for instance. Watch as the app's GUI applies the color changes in realtime.
A Blaiz Enterprises' color scheme (*.bcs) is comprised of twenty colors that are responsible for coloring every aspect of the app's GUI. Two for the frame, nine for important area colors called Title colors, and nine more for common zones, called Standard colors.
Each built-in color scheme has it's own unique set of colors. A custom color scheme allows the colors to be changed. To create a custom color scheme, scroll down toward the end of the list to the section titled "Custom". Here you'll find 10 custom color scheme slots. Each one can be customised. Select a slot. Say slot 1. A series of color palettes will display on the right. Click one to choose a new color. Or, click and hold to drag your cursor/finger around the screen and acquire a new color in realtime.
All changes are saved automatically.
⏶Give your new color scheme a nameTo give your color scheme a name it must be saved to disk. From the Color Schemes list (Options > Color), select the color scheme in question and click "

Menu >

Save As...". Type a name and click the "Save" button. Your color scheme will be listed under the "Saved" section of the Color Schemes list.
⏶How to use your named color schemeFrom the Color Schemes list (Options > Color) scroll down the list until you reach the section named "Saved". Here your saved color scheme will be listed. Select it to apply.
⏶Can I edit my saved color scheme without having to re-save it?Yes. Select your color scheme from the "Saved" section of the Color Schemes list (Options > Color) and edit the colors on the right as required. Any and all changes are automatically saved to disk as required, eliminating the need to explicitly save.
⏶How to set a background imageThere are 45+ built-in background images and effects, ranging from static to animated. To set a background image select "Options > Background". From the list of background schemes select one. The app updates in realtime.
Some background schemes have properties which define how they appear on the screen and/or what sort of animation effects they display. For instance, some allow for their strength, coloring, speed and animation options to be adjusted. All changes reflect in realtime.
⏶How do I change the frame style, size and sparkle strength/effect?The frame on our apps have a long history reaching back to the late 1990s, where they first adorned our FastCards and PowerCards (still and animated musical cards).
They primarily serve as a large easy-to-grip area for resizing the app easily. And also add a touch of decoration.
A frame can be made wider or narrower as you see fit. An optional randomised sparkle effect can also be adjusted, making it bolder or subtler, or even removing it entirely for a sharper, cleaner appearance.
Navigate to "Options > Frame". Here a list of built-in frame styles are presented. Toward the bottom are two sliders for adjusting the frame's sparkle effect and size.
A frame can be resized to any size from 0px (no frame) to 72px (pixels).
⏶Automatic zoom and scaling up of text and imagesCan't see the text well? No problem, our app can resize the text to your requirements. Or zoom it up automatically on 4K and 8K monitors and TVs.
Navigate to "Options > Font"
High resolution monitors, such as 4K and 8K displays have far more pixels (colored dots) per inch on screen than previous generations of monitors. Consequently, an app without scaling abilities can appear too small on these monitors. That's because as new monitors and TVs gain ever greater resolutions, statically sized apps shrink in size. This is why a modern app must be able to scale up to match the resolution.
Our automatic zoom function does this, scaling up the app as required.
A comparison of common monitor resolutions:
2K = 1920w x 1080h = 2,073,600 pixels
4K = 3840w x 2160h = 8,294,400 pixels
8K = 7680w x 4320h = 33,177,600 pixels
A 4K (ultra high definition) monitor uses four times (4x) more pixels than it's 2K (full high definition) counterpart. A statically built app without scaling would shrink to 50% of it's size, making it difficult to use. An operating system may counter this by scaling it up using pixel zooming, but this tends to blur the app.
An app on an 8K monitor would suffer from even greater shrinkage, down to a quarter (25%) of it's original size. This app scales up without blurring.
On a 2K monitor there is no need to scale the app as it's the app's native size. On a 4K monitor the app switches to a zoom factor of 200% (2x), upscaling text and images and the main window's dimension accordingly, and 400% (4x) on an 8K monitor. The end result is an app that appears consistent over different monitor resolutions. You can override the automatic zoom feature and set a zoom of: 100%, 200%, 300% or 400%.
Note:
Setting the zoom value to 300% or 400% on a 2K monitor may render the app so large as to make it unusable. If this happens, you can press the "F2" key at anytime to restore the app's defaults.
⏶Change the text size (font size)Set a font size from 6 to 24. Navigate to "Options > Font" and select a size. The overall size of text displayed in the app changes. In some special instances the app may display slightly larger or smaller text in certain special areas, but this is scaled from the current size setting.
Size 10 is default.
Not all sizes are supported by all fonts. On Ubuntu for instance, a large font size for Arial can cause text to appear weird or slightly off. If this occurs, try reducing the font size a tad, or alternatively select another font name.
⏶Change the font nameA font name determines what sort of characters appear on the screen and in what style. Navigate to "Options > Font".
Older fonts like "System" tendered to be small images or bitmaps, one for each character, and tended not to scale up in size too well. To save memory, not all sizes were stored inside the font. Whereas modern fonts tend to use mathematical vectors to draw a series of shapes to form characters on the screen. These fonts scale up well.
Select a font name from the eleven common font names. Arial is a good choice, as it is widely supported by most operating systems, even as far back as Windows 95.
If a font name is selected, such as "DejaVu Sans" and it's not supported by the operating system (Windows 95 as an example) then a close approximate is used instead.
Perhaps you have a specific font name in mind. Then click the "Custom" option once to switch it on, and click it again to show a Font selection window. Choose your font name from the list provided and click the "OK" button.
Should for any reason the app become unreadable or hard to read after choosing a new font name - it can happen with a bad font, a foreign language font, or a symbols only font like "Wingdings" - then simply press the "F2" key to restore the app's defaults.
⏶Setting the font feather level and font specific antialiasingFor maximum compatibility, two completely separate antialiasing systems are employed to render a feather around the edge of text characters, softening their often harsh outline on LCD screens.
Navigate to "Options > Font".
1.
Font Feathering
This option is a custom built text feathering technique that's universally applied to both bitmap fonts (older) and vectors fonts (newer). In this way it allows for a quick and direct text feathering level to be set in realtime without the need for a complicated or multi-step setup process. It also works on old operating systems which had no support for it, or on fonts that don't have a feather, or on fonts that drop it off at smaller sizes.
It applies an even blurring effect around the edge of each text character in realtime. A higher setting generates a stronger effect. Change in strength takes effect immediately.
A high quality computer monitor may only require a "Low" setting, whilst a lower resolution device like TVs, which can distort some of it's pixels may require a higher setting of "Medium" or "High" for best results.
2.
Font Specific Antialiasing
This method relies on the font to provide the feathering information. If the font has no feathering, then none will be applied. Take the font Arial for instance, in our app, the feathering information cuts out at size 12 and below, rendering sharp characters on screen.
To adjust the font's feathering strength select a value between "Dark" (full strength) to "Light" (least strength).
⏶App startup styleThe app can be set to start normally, minimised, maximised or fullscreen. To adjust this setting, navigate to "Options > Settings".
From the Start Style section select an option -
Normal:
Start the app as a window. This is the default mode.
Minimised:
Start the app hidden from view on your taskbar.
Maximised:
Start the app maximised, filling the available work area of the screen.
Fullscreen:
Start the app in fullscreen mode.
⏶Creating a link to the app on your Start button, Desktop and Automatic StartupThe app can create, maintain and remove links for you. Navigate to "Options > Settings".
Three link modes are supported:
1. Start button
2. Desktop
3. Automatic Startup
1. The Start button link, when selected, automatically creates and maintains a "Email Attachment Transformer by BlaizEnterprises.com" link (shortcut) on your Start Menu. To remove the link unselect the option.
2. The Desktop link option operates as above, creating and maintaining a link on your Desktop named "Email Attachment Transformer by BlaizEnterprises.com" when the option is selected. To remove the link unselect the option.
It should be noted that as long as either option is selected within the app, the links will be maintained (automatically re-created if need be), even if they're manually deleted outside of the app.
3. Automatic Startup creates/maintains a link in the startup location of your computer, which tells Windows to start the app automatically. To remove the link unselect the option.
Note:
If any of the links above are selected and you are planning to remove the app from your computer, you should unselect all the options first, then remove the app, otherwise Windows can get a little weird and put the links back in some cases without the app's involvement.
⏶A few app system settings explainedThe majority of the app's system settings can be found in one location. Navigate to "Options > Settings".
An option is considered "on/enabled/selected" when lit up, and "off/disabled/unselected" when unlit.
Round Corners:
Rounded corners for windows and controls
Soft Close:
Automatically close active dialog windows - e.g. Save, Open, Font etc - when a click or touch occurs outside of the window
Safe Area:
Ensures the app's window remains visible on screen at all times, and any sub windows or dialogs are visible within the app area. Any attempt to drag a window out of range triggers an automatic position correction. A passive system that constantly checks window position and monitor size. Support for single and multi-monitor configurations.
Show Splash:
Displays an informative/artistic splash screen on app startup. Unselect to disable.
Realtime Help:
Scroll help information and hints about a control under the cursor or finger touch area across the top of the current window or menu
Hints:
Hover over a control to show help related information in a popup bubble
Touch:
Comfortably enlarge controls and menus for touch access (finger taps)
Double Clicks:
Some options work best with a double click/tap for confirmation. This option supports the traditional double click mode. For example, navigating a disk drive using a double click to switch between folders.
On Top:
Set the app above all other app windows
Economy:
Normal app operation can use a lot of paint cycles and CPU power, especially if it's rendering graphics and effects continuously on the screen. Economy mode throttles back this usage during periods of extended idleness, e.g. when there is no direct app keyboard input, or indirect mouse cursor movement or finger taps. For more information refer to the "Economy mode" topic.
32bit Graphics:
Not noticeable on today's powerful computers with their 32bit monitors, it however can deliver a small performance improvement on older computers running 24bit graphics
Frame Maximised:
Show the app frame when maximised. The frame is always hidden whilst in fullscreen mode
Safe Background (Strength):
An optional background image (static or animated) can be set. If the strength of this image is set too high the GUI can be hard to read. This option limits the background strength to a safe maximum level of 100. Unselect this option to permit the full range of background strength (0-255). If the GUI becomes hard to use or unreadable, press the "F2" key at anytime to restore the app's defaults.
Multi-Monitor:
Span multiple monitors when maximised or in fullscreen mode
Center Title:
Center name in window header
Toolbar Alignment:
Left, center, or right align toolbar links
Color Contrast:
Contrast important settings and input areas
Monochromatic Images:
Display high-contrast, color-adaptive, monochromatic images
Highlight Above:
Retain highlight and other important GUI zones above the background image
Brightness:
Adjust brightness from 60 (darker) to 130 (brighter). Default is 100 - no change.
Unfocused Opacity:
Set app opacity when not focused to 30-255. Mostly transparent (30) and fully opaque/completely visible (255). OS support required for this option to work.
Speed (Opacity Transition Speed)
The speed by which to switch opacity between focused and unfocused. Speed range is 1-10. Slowest (1) and fastest/instant (10).
Focused Opacity:
Set app opacity when focused to 50-255. Semi-transparent (50) and fully opaque/completely visible (255). OS support required for this option to work.
Cursor:
Choose from a series of built-in mouse pointers that scale from small to large. A range of static colors of: Red, Orange, Pink, Yellow, Purple, Aqua, Blue, Green, Grey, Black, White, along with Default and Custom.
Two dynamically colored cursors are also included: "Adaptive - Hover" and "Adaptive - Title". These special cursors acquire their coloring from the current color scheme.
The custom option supports static cursor ".cur" and animated cursor ".ani" file formats. Select "Custom" to use, and click again to select an external cursor.
Frame Sparkle:
Set the intensity of the random texture in the frame and window header. A range of 0 (off) to 20 (strong) is supported.
Frame Size:
The app's frame size can be adjusted from 0 (none) to 72 (large).
Scrollbar Size:
Set the width or height of all scrollbars. Supports a range of 5 (thin/short) to 72 (wide/tall).
Wine Compatibility:
Allows for some operations to be specifically tweaked for operation on Linux and Mac. One such operation is volume handling. For more information on Wine refer to their website
www.winehq.org . Detection of Wine is based on the presence of drive "Z:\".
Restore Defaults - Button:
Click the "

Restore Defaults..." button at the bottom of the Options window to restore the app's default settings (system settings). Alternatively, you can press the "F2" key and confirm.
An app typically has settings in addition to these, which are not typically restored. They should be adjusted via the app itself.
⏶Place the app above other windows (on top)Click the app menu button

(top right) and tick "On Top". Alternatively, select "Options > Settings" and select the "On Top" option.
⏶How to prevent the splash screen from displaying on app startBy default the splash screen is displayed with a momentarily pause on startup. You can turn this feature off by going to "Options > Settings" and deselecting the "Show Splash" option.
⏶Show App FolderDon't know where this app is located on your hard disk or pen stick? Click the app menu button

(top right) and select "

Show App Folder". An explorer window will display with the app's binary (*.exe) and storage folder listed.
⏶Economy modeAutomatically reduce battery/power consumption and CPU/graphic loads on your computer when Economy mode is engaged and the app is left to idle for a period of time.
After a brief idle period of 10min+ the app reduces paint cycles down to a maximum paint rate of 2fps. And after 30min+, down to 1fps. Internal processing loads will also typically reduce, lowering CPU demand and power consumption as well.
A single keyboard stroke directed at the app or a global mouse click or touch instantly disengages the economy saving state and returns the app to full operation.
To turn Economy mode on/off:
Select "Options > Settings" and select the "Economy" option to switch it on, and deselect it to turn it off.
⏶Some technical limitations of this appThe Gossamer Code Foundation - our 4th generation codebase - which powers this app has been engineered with care and patience to a high level of quality and reliability.
As our code is rather unique and almost entirely custom built, there are some technical limitations which make our apps incompatible with some extended features of modern operating systems.
These limitations mainly concern the use of UTF-8 and UTF-16 encoding of text, and more specifically filenames. At this stage the app works with the legacy Windows-1252 character encoding for both text processing and filenames. This makes our app unable to handle foreign language text and filenames. The app cannot load or save files with filenames that have special and/or foreign characters, and/or emojis in its name. Nor can it read, edit or view text with these characters. All text and filenames are restricted to english ASCII using the Windows-1252 encoding standard.
In addition, some options and minor operations may not work as expected, or at all on operating systems other than Microsoft Windows. Though an enormous amount of time and effort has gone into harmonising the look and feel, behaviour and reliability of the app across multiple flavours of Microsoft Windows, Linux and Mac, it is not always possible to catch every failure point, or in some rare cases make it work properly, though we always endeavor to do our best.
A side note, our codebase is still running well on 32bit in 2025. Yes, 32bit! Some might see this as a limitation, but we see it as a flexible, inexpensive, and widely adopted execution pathway, with support for many platforms.
⏶What is a portable app you ask?A portable app is a big leap forward for apps in general. A standard or traditionally engineered app requires a lot of support in the form of libraries, data files, images, scripts, etc and the list goes on. You get the picture. Some portable apps out there still include this bundle of bits, they merely offload it into a local folder. A dump of goodies of sorts.
We tend to see a portable app in quite a different light. Our vision of a portable app is designed tight, clean, free of bloat, and all data where possible is included directly within, structured right into the fabric of the app itself, and designed from the bare-metal up if required.
Though the most important difference between a standard traditional app and a portable one, is that a portable app will not install on your computer. This is extremely important, as the installation process is often messy, and can clutter up your computer by dumping a lot of stuff all over the Windows file structure and registry.
A portable app will not do this, which keeps your computer clean and running smooth and fast as it should. Unfortunately most software is not designed with portable in mind. They're more akin to a large leaky box of bits than tight engineering. And because a portable app is not installed on your computer, it runs outside the normal scope of the operating system, and is not locked down or tied to it. And thus can be moved.
Typically a portable app will reside on a USB pen stick, removable media, or in a special folder on a portable hard disk. This makes it easy to take from one computer to the next, and use over and over. An immensely valuable freedom, and something an installed app can only dream of.
But a serious technical hurdle must be overcome for a truly portable app to be free. And that is the humble setting. Yes, a portable app must be able to handle it's settings on it's own. It must be able to read them from disk, filter them, check and correct them when required, and write them back to disk. All without the help of the Windows' registry or other operating system dependent structures.
An installed app typically can't or won't do this. Instead, it relies on Windows and the registry to manage it's settings and other important data sets. Thus it takes a higher level of technical competence to escape this situation.
Here is our current standard for a portable app:
- Require no installation or setup
- Require no additional DLL libraries to run and perform it's core function
- Make no alteration to the host operating system, or its settings, files, libraries or core functions, or the Windows registry, unless it forms a part or a whole of the app's core function, and then, only when initiated by the user
- Be able to run "out of the box"
- Require no compiling, conversion, installation or setup of support structures in order to execute, except for when such an environment constitutes an execution enabling environment, such as a command translation service like Wine
- Be free of zipped or otherwise externally bundled blob structures containing folders, files and bits
- Operate on less powerful hardware to facilitate operation on a broad spectrum of computers
- Possess a less demanding software api landscape to facilitate execution on a broad range of operating systems and software translation environments
- Require no special software libraries be present in order to run, such as .NET or JAVA, unless typically pre-installed on the target operating system or execution environment
- Not require an internet connection to run, unless the connection is required to fulfill the app's core function, such as a web server
- Require no downloads, addons, or registration in order to run
- Provide help and documentation offline via a built-in viewer, or by limited external means, such as Notepad
- Be self-contained with all necessary files, data sets, and samples stored within it's internal structure, such that access be provided preferably through direct enabling mechanisms
- Store, hold and manage external app settings and user data in a local sub-folder, and that sub-folder be easily identifiable as belonging to the app
- Provide a mostly consistent appearance and experience to the user across the widest possible range of operating systems and execution environments
- Value backwards compatibility, and be able to actively make use of that older hardware and software
- Possess a compact, bloat-free footprint
⏶How to remove the app and what you should do firstAs a portable app does not install itself on your computer there will be no automatic uninstall option listed in Windows. The app must be removed manually. But this is not difficult.
However, first ensure these options listed below are unselected before proceeding. To do this, navigate to "Options > Settings".
1. Start button link
2. Desktop link
3. Automatic Startup link
If these links are not removed first, they may linger due to the oddities of Windows and it's complex security protocols and practices.
If this app is administered by a 3rd party system that system should be used to remove this app. If not, then click the app menu button "

" (top right) and select "

Show App Folder". An explorer folder will display with the app's executable (*.exe) and storage folder.
Make sure any data precious to you has been backed up or moved out of the app's storage folder before proceeding. When you're ready, close the app and right click on it's EXE and select the Delete option. If a prompt appears, confirm your intention to delete. Repeat for the storage folder.
The app is now removed from your computer, USB pen stick or hard disk.
⏶Help my app doesn't look right what should I do?If for some reason your app doesn't appear right, or you think you're turned on or off some system setting but you've not sure which one, not too worry, you can restore the app's default settings in two easy steps.
From anywhere in the app press the "F2" key to display the "Restore Defaults" window. When you're sure you're ready to proceed, click the "Restore Defaults" button to restore the app's default settings. This will reset the app's default behaviour, remove the Start button/Desktop and Automatic Startup links, and revert the color scheme, text size, font name etc.
⏶MIT LicenseCopyright 2025 Blaiz Enterprises (
www.blaizenterprises.com )
Permission is hereby granted, free of charge, to any person obtaining a copy of this software and associated documentation files (the "Software"), to deal in the Software without restriction, including without limitation the rights to use, copy, modify, merge, publish, distribute, sublicense, and/or sell copies of the Software, and to permit persons to whom the Software is furnished to do so, subject to the following conditions:
The above copyright notice and this permission notice shall be included in all copies or substantial portions of the Software.
THE SOFTWARE IS PROVIDED "AS IS", WITHOUT WARRANTY OF ANY KIND, EXPRESS OR IMPLIED, INCLUDING BUT NOT LIMITED TO THE WARRANTIES OF MERCHANTABILITY, FITNESS FOR A PARTICULAR PURPOSE AND NONINFRINGEMENT. IN NO EVENT SHALL THE AUTHORS OR COPYRIGHT HOLDERS BE LIABLE FOR ANY CLAIM, DAMAGES OR OTHER LIABILITY, WHETHER IN AN ACTION OF CONTRACT, TORT OR OTHERWISE, ARISING FROM, OUT OF OR IN CONNECTION WITH THE SOFTWARE OR THE USE OR OTHER DEALINGS IN THE SOFTWARE.
⏶
 eat.exe (1.62 Mb)
 eat.zip (0.84 Mb)
 eat.7z (0.66 Mb)
 eat-sourcecode.zip (2.93 Mb)
 eat-sourcecode.7z (2.23 Mb)
